Key Takeaways
Is Your HealthTech Product Built for Success in Digital Health?
.avif)
A metaframework is a framework that extends the scope of another framework. In this case I'm going to present you the first draft of upcoming agentic workflow metaframework's architecture based on Pydantic AI framework. This means that the solution described here focuses on automating the construction of a complete workflow consisting of agents and more.
The solution is graph-centric (using pydantic-graph library), but after yesterday's lecture with the founder of Pydantic, I'm considering rethinking this approach. Currently, there are two paths that this architecture could take in the near future:
- we can simply wait for the upcoming release of Graph v2 from Pydantic and see what new features it will bring
- or we can switch from building nodes in a graph to a Temporal workflow
And what exactly are the problems with the graph approach? It's mainly about scaling. Graphs are more susceptible to workflow dynamics limitations because the paths between nodes are statically defined as graph edges (let's call it a static topology issue), although there are workarounds for this problem that can complicate the logic of the code.
But let's move on to the current graph architecture :) The framework will be published in the upcoming weeks (or sooner) and I will definitely post about it then, but in the meantime, I will just outline the concept of how workflows could be created step by step according to this concept.
Step 1: Preparing the engines
An engine is essentially an agent wrapped with instructions, system prompts, tools and toolsets, making it specialised fot a specific task.
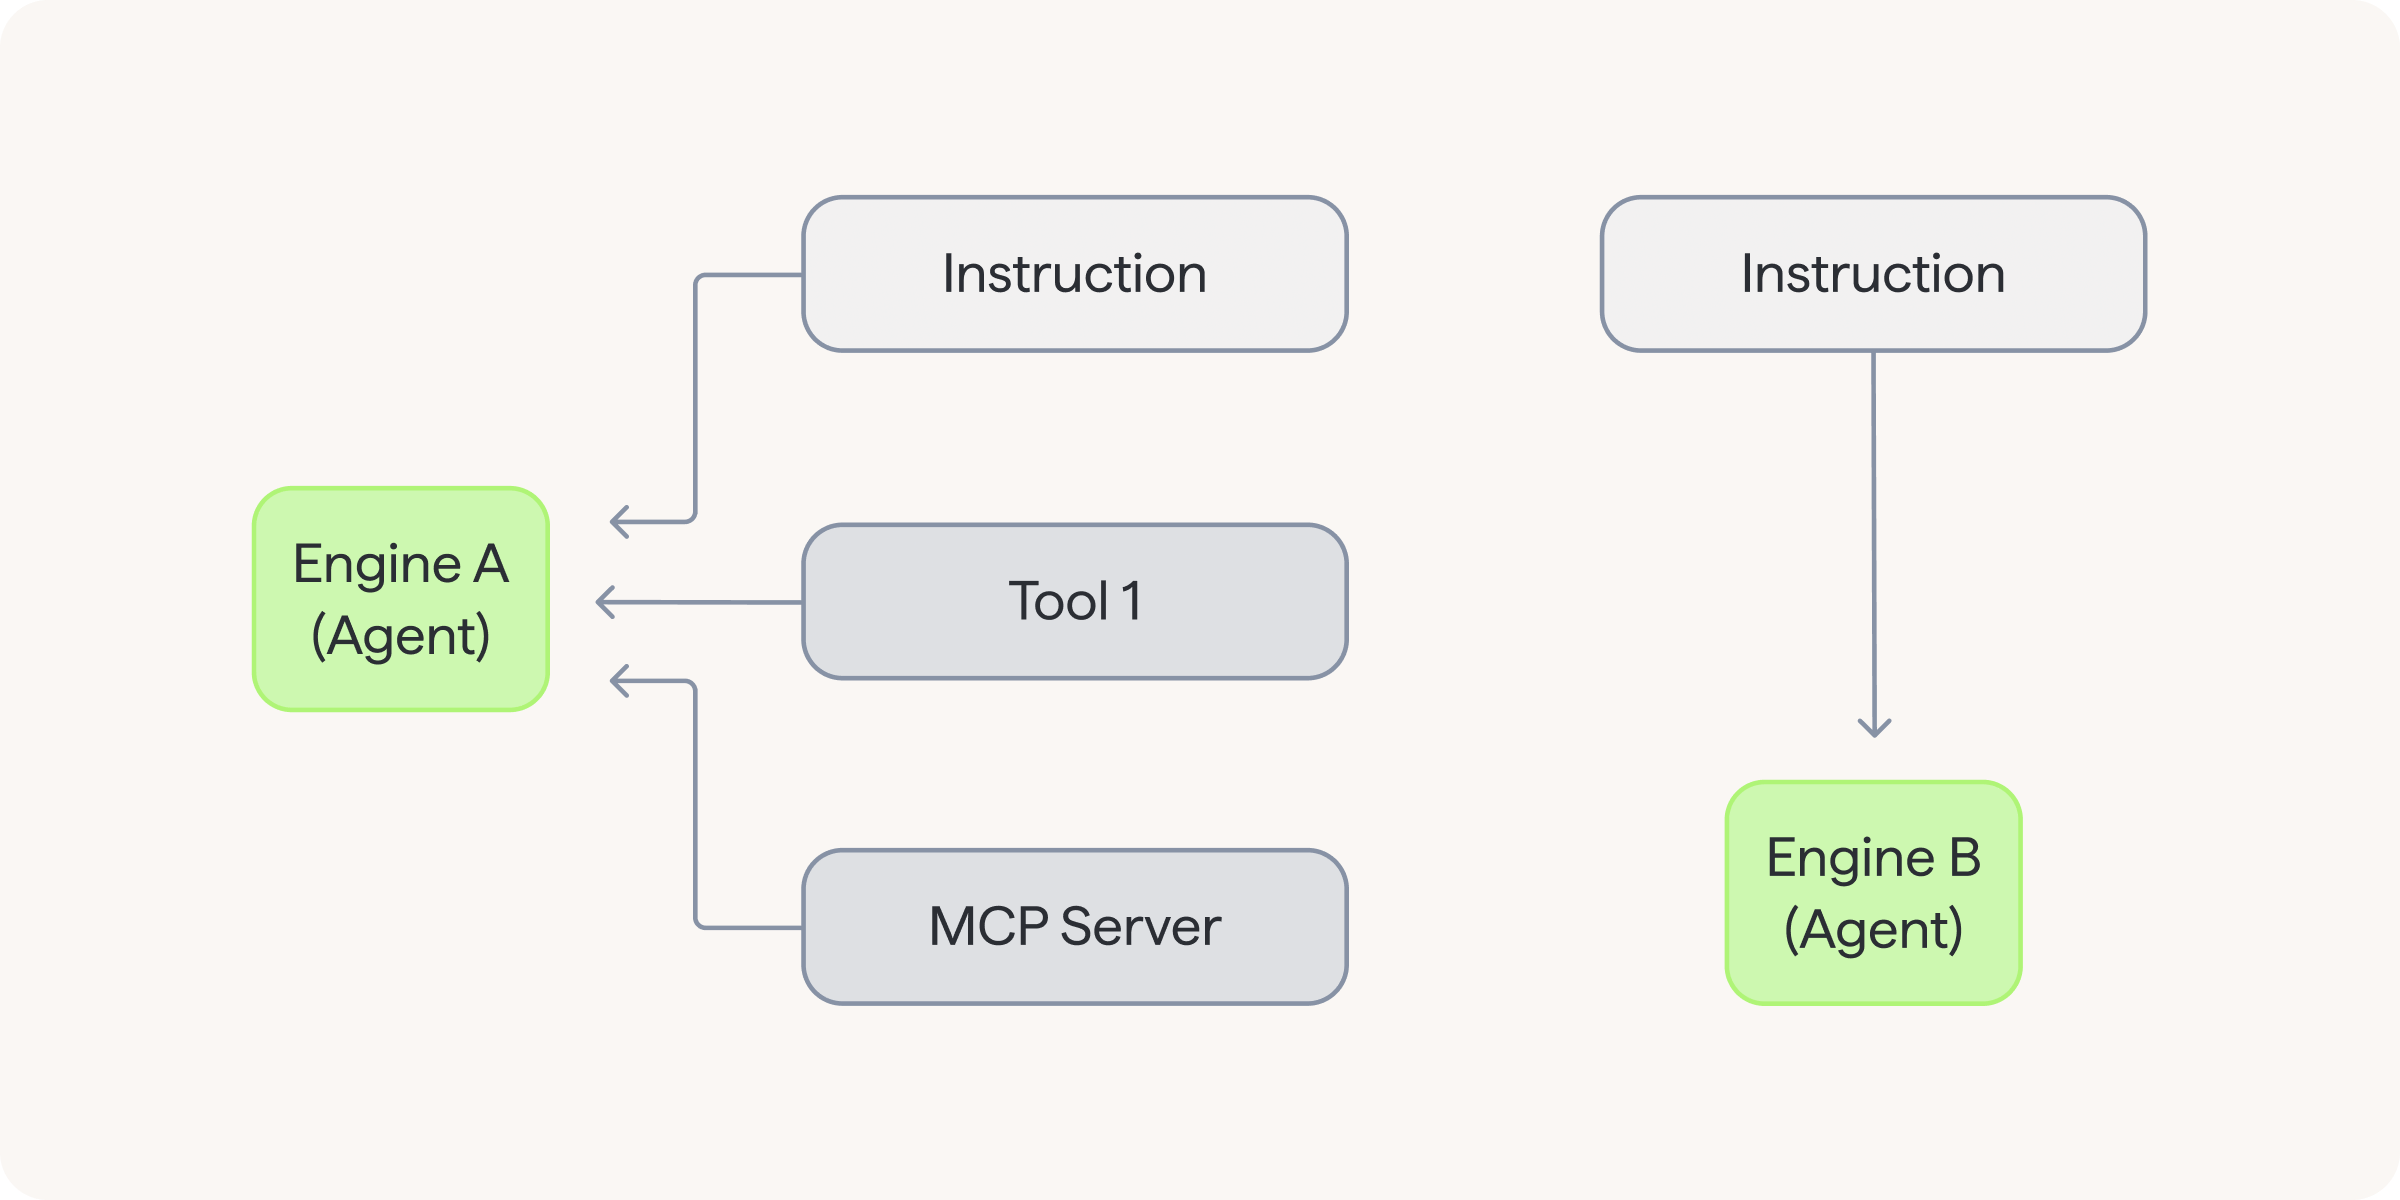
Engines are the first building block of any workflows built with this metaframework. Let's explain the components we use to encapsulate our agents:
- System prompts - contextual messages we provide to enrich user prompt for the agent
- Instructions - essentially the same as system prompts, but retains the history only from currently active agent instance
- Tools - usually an external function to execute some programmed logic or to retrieve data from storages (like databases) or APIs
- Toolsets - collections of tools; among other things, MCP servers connections are hidden under that component
What is the key here, engines are specialised and self-contained. Besides just mentioned components, we can define our own attributes. Examples of engines specialisations: router, guardrails, translator.
Step 2: Wrapping engines into nodes
A node is the layer that wraps an engine and adds workflow logic (state managment & routing by conditional branching).

Think of nodes as the building blocks that later form the graph. The node decides which path to take by returning the next node (return type is the edge of the graph). Nodes have an access to the initialised instances of individual agents (within engines) through global Graph Context (more on how they get there later).
Step 3: Building the graph
Graph just collects nodes together. At this stage, we do not even define which node is the initial one.
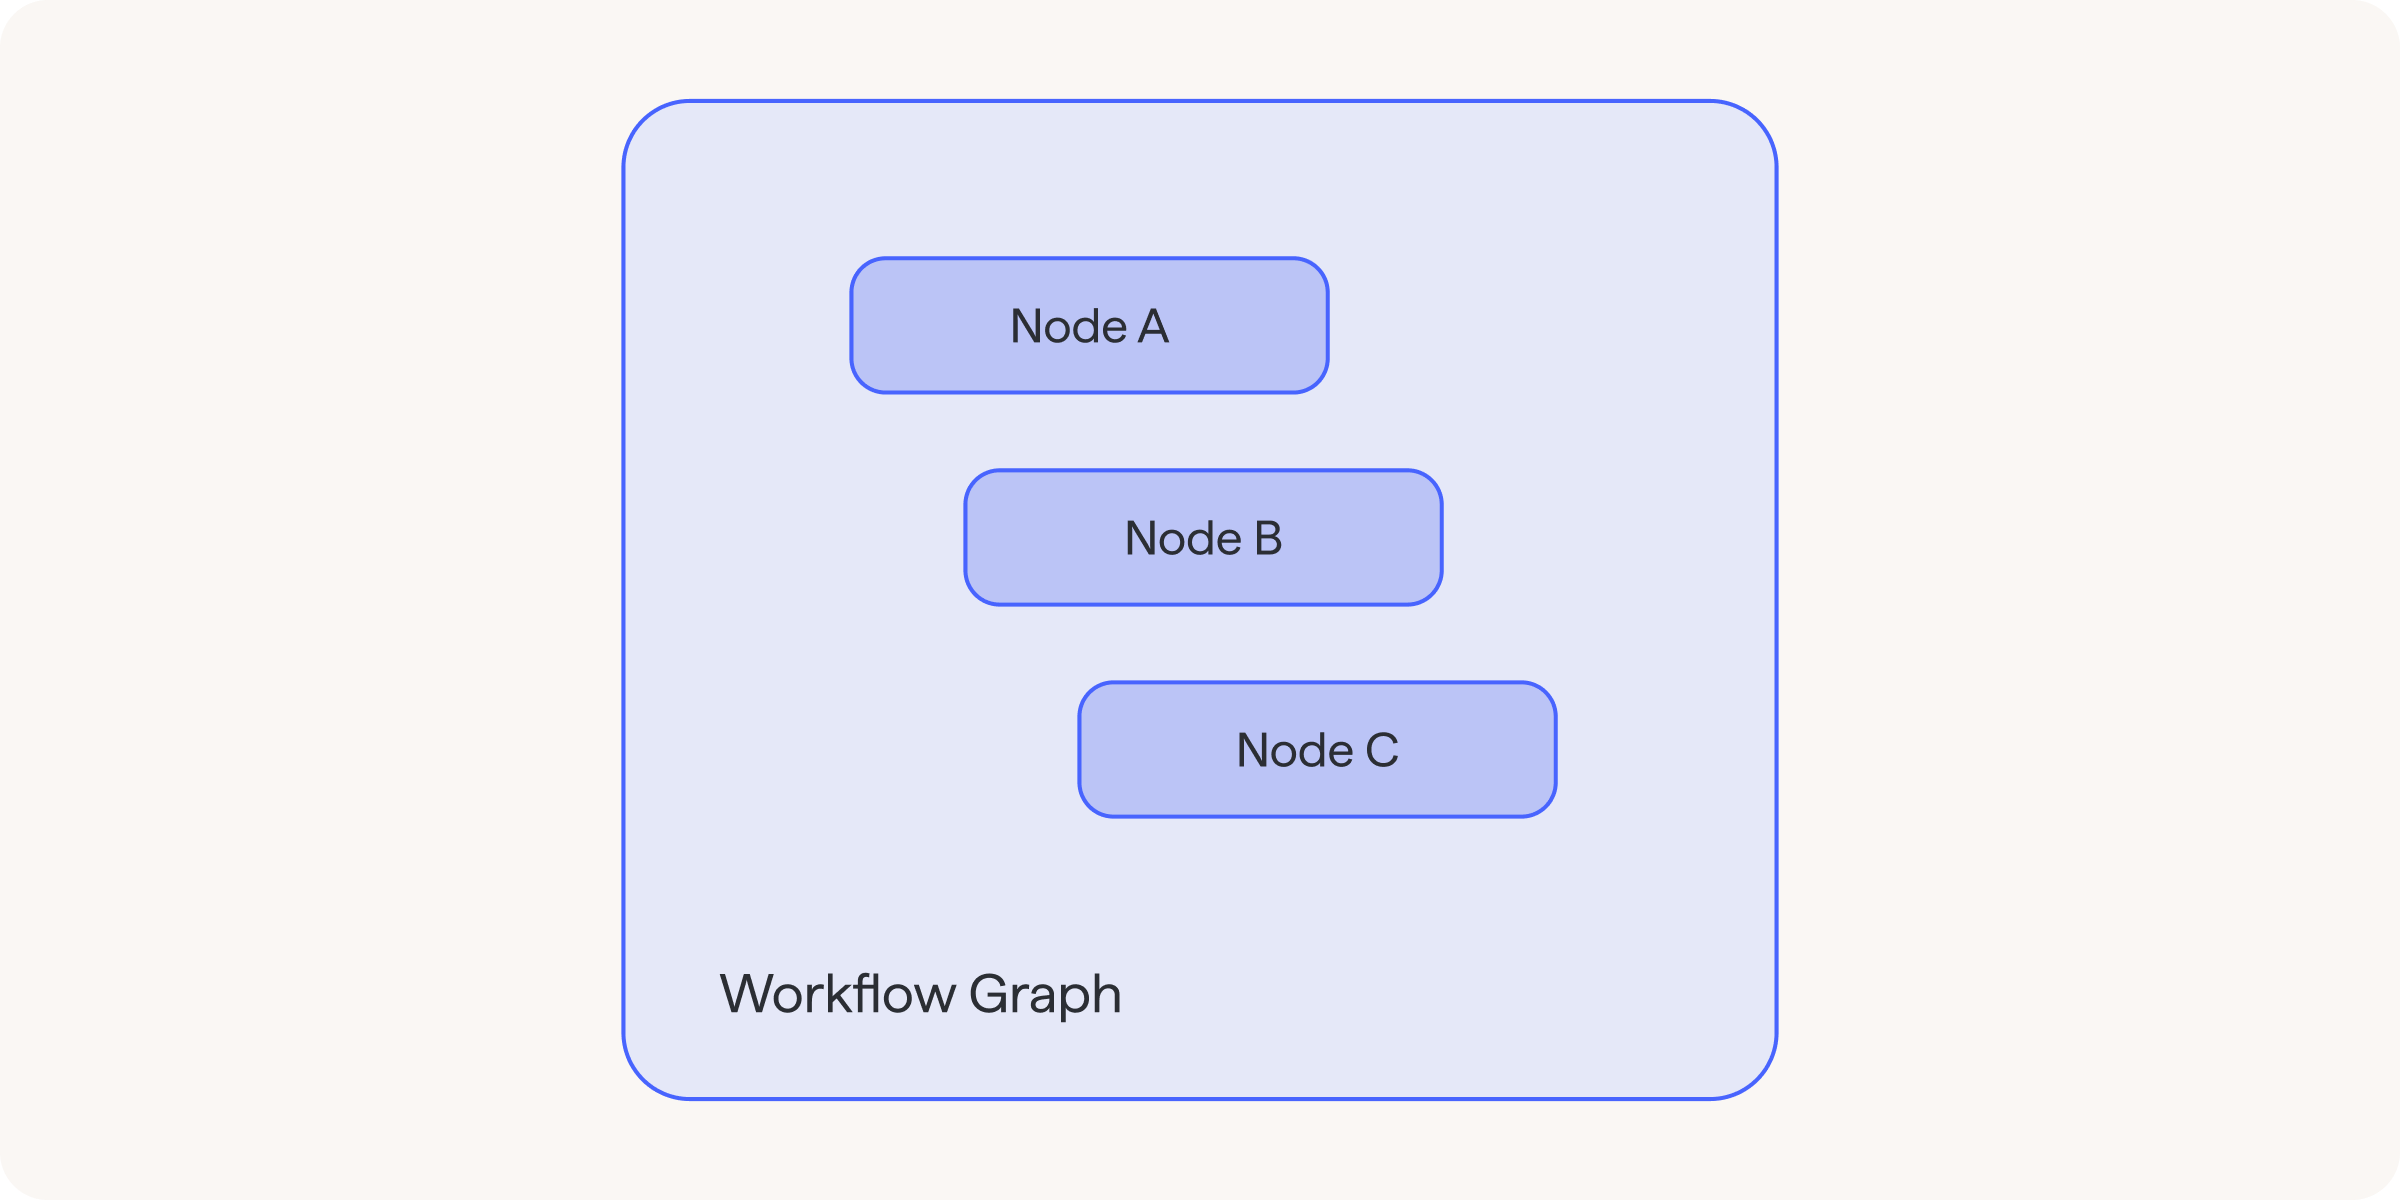
All the user needs to do at this stage is import the selected nodes, create a graph instance, and add imported nodes to it in any order. The start node will be defined in the last step, while the last node is the End node, which is built into pydantic-graph. Returning it from any node ends the workflow.
Step 4: Creating the agent factory
The factory is the central element that stores all the engines that the user wants to use in the workflow, along with all their configurations, and returns an instance of the agent manager.
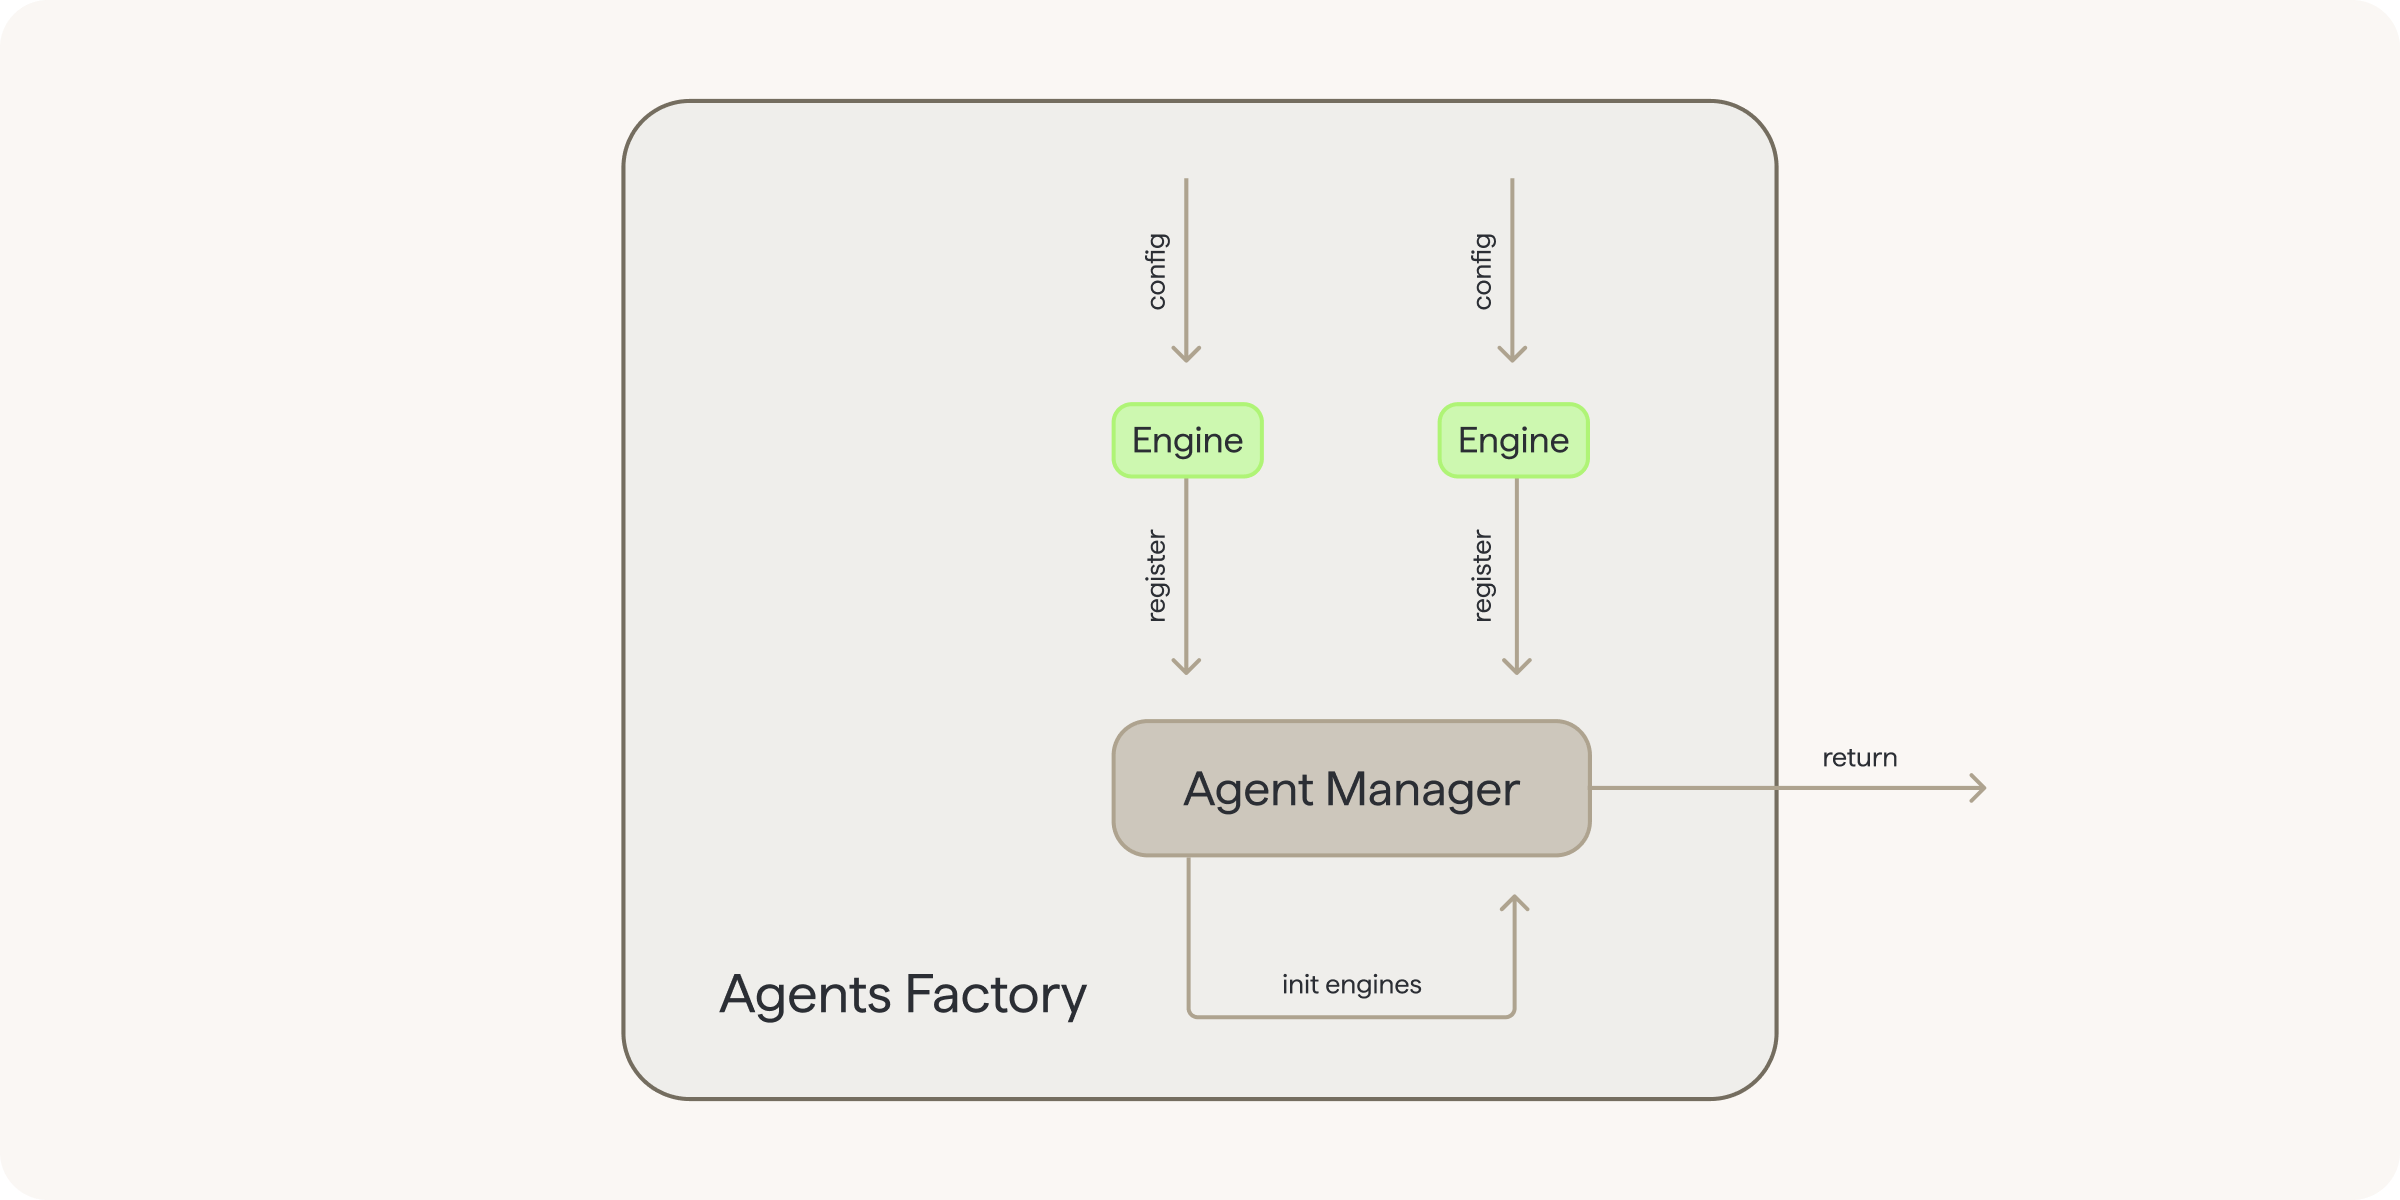
First, it would be appropriate to explain what Agent Manager is. It is a predefined class (the user does not need to create or modify it) that manages engine instances. Its basic functions are:
- storage of configurations for all engines (agents) that will be used in the workflow
- initialising engines instances based on the stored configurations
- returning a dictionary with ready instances of engines (these will then be added to the graph context, from which nodes will have access to engines, but it's going to happen in the next step)
Within such a factory, a new instance of Agent Manager is created, and the user then configures engines and registers them to the manager instance they have created. They then use this instance to initialise the registered engines and return this instance.
Step 5: Initialising your custom workflow
Once you've prepared engines, nodes, graph and factory, you can use agent manager to connect them all.

The first step we want to take is to create an Agent Manager instance. To do this, simply use the agent factory, which creates and returns a prepared instance (with registered engines). Next, we want to run the graph using the run() method, where we first enter information about which Node is the starting point, and secondly, we specify the dependencies that the agent manager creates for the entire graph (passing, among other things, a dictionary with initialised instances of engines that the nodes will access).
Frequently Asked Questions


.png)